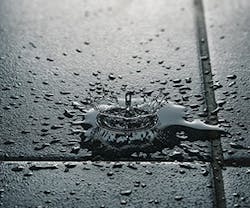
Epic Fail: The Problem of Moisture and Flooring
In any commercial interiors project, flooring specification establishes the foundation upon which so much of successful design hinges. From wayfinding and safety to noise attenuation, branding, and aesthetics, there is hardly an element of an interior design program that is not either enhanced or hindered by the choice of flooring within a space. As such, the floor selection and installation process can often be the deciding factor between a beautiful, effective environment and a costly mistake.
Yet in spite of flooring’s significance within the scope of a project, too many design, construction, and building management professionals often overlook or neglect to effectively address the most commonly recurring and expensive flooring-related problem: moisture. In fact, North American commercial property owners spend an estimated $2.4 billion on remediation of structures and floor coverings as a result of moisture-related flooring failures annually. An additional $1.2 billion is spent on topical moisture treatments (of varying effectiveness) in an effort to address moisture issues prior to the floor covering being installed. These incidents add significant cost to any project in terms of project delays, unplanned expenses associated with costly topical systems, flooring replacement, and litigation, as well as the incalculable lost opportunity cost associated with business disruptions, loss of reputation, and loss of return customers.
Fortunately, there are a number of steps design and construction professionals can take to mitigate these risks, including conducting proper testing procedures, identifying and addressing areas of concern, engaging in effective communication (early) with the project team, and advance planning. This article will not only identify the most troublesome flooring problems created by the presence of moisture in concrete, but will also outline specific steps that design practitioners and facility executives can take to mitigate the risks of exposure to this persistent and expensive issue.
What Could Go Wrong?
Regardless of the type of floor covering in question—be it carpet, laminate, rubber, tile, vinyl, or wood—nearly every product is affected in one way or another by the presence of excess water vapor emissions from concrete and accompanying pH issues. We’ve all seen the dreadful results of flooring products that have failed due to moisture, as the telltale signs are obvious: debonded sheet flooring, bubbles, blisters, adhesive degradation or oozing, cupping, dents or indentations, gaps between tiles, mold growth ... you name it. If left untreated, the implications to the building and its occupants can be significant, including the entire floor lifting off of the slab or a host of health and safety problems that result from the presence of mold and mildew.
Moisture can be introduced to the flooring surface from a leak in the plumbing or a natural disaster, for example, which requires professional repair and remediation to the infrastructure of the building. But for the purposes of this article, we will focus specifically on the somewhat less obvious source of moisture: the natural water vapor present in the concrete slab. The reason for the emphasis on moisture in concrete is because of a simple, but critical, fact: all concrete contains moisture, which is not static in nature. On the contrary, water vapor present in concrete slabs—both new and existing—will interact with flooring materials and the environment, and can have a detrimental effect like those scenarios described above if not taken into consideration when planning and installing the floor.
As stated previously, the industry-wide financial implications associated with moisture-related flooring failure are astronomical. Beyond the obvious price of purchasing new materials and labor, there are a number of other factors to consider when calculating the true cost of replacing a flooring system due to excess moisture. For example, once moisture-related problems surface, locating the source of moisture may require the service of a construction professional and/or a health inspector to determine the extent of the damage to the space. Permits or other fees may also be involved depending on local regulations.
More importantly, consider the fact that water damage may not be limited to the floor itself, but may have compromised other vital building materials such as studs, floor support beams, and sheetrock. Regardless of the scope of the damage, site remediation, replacement materials, and labor also need to be factored into the equation.
Areas of Concern: New Construction & Renovation
There are two areas of concern when identifying and preventing moisture-related flooring issues in construction. Depending upon whether it’s new construction or a renovation project, building professionals need to understand the underlying issues inherent in both scenarios when it comes to the presence of moisture in concrete slabs. We’ll address new construction first, including what to look for and what steps to take when confronted with excess moisture, and then repeat the process for existing slabs and trenches.
1. New Construction Slab
When it comes to new building projects, deadlines and delays mean time is at a premium, and construction schedules rarely contain sufficient time to facilitate thorough drying of concrete. This can become a major issue on the floor surface, as contractors or project managers may push to get product installed before the concrete has had ample time to eliminate excess moisture that contributes to failures.
Under optimal conditions, new construction slabs require one month per inch of drying time for normal weight or hard-rock concrete before installation of flooring products. The ideal water-to-cement ratio should be between .45 and .50 under ambient conditions (a minimum temperature of 70° F with a maximum relative humidity of 50 percent, and constant air movement at 15 m.p.h.) For concrete batched with lightweight aggregate, on the other hand, the drying time is two months. Lightweight aggregate concrete requires twice as much time to dry as normal weight concrete of the same thickness due to the pre-saturation of lightweight aggregates.
One of the reasons design and construction professionals run into moisture issues with concrete is because they often mistake the curing process with drying. “Curing” is the chemical reaction that creates the agglomerate better known as concrete, while “drying” is the loss of water not needed to hydrate the cement. Curing compounds, commonly used today as an alternative to keeping the concrete surface physically wet during the initial curing period, will substantially lengthen the drying period.
According to the Portland Cement Association (PCA), slabs on ground such as pavement, sidewalks, parking logs, driveways, floors, etc.; and structural concrete used for bridge decks, piers, columns, beams, slabs, cast-in-place walls, retaining walls, etc., require a minimum curing period of seven days for ambient temperatures above 40° F. Alternatively, the American Concrete Institute (ACI) Committee 301 recommends a minimum curing period corresponding to concrete attaining 70 percent of the specified compression strength, which commonly matches the typical seven-day curing time specified by the PCA. Further, the PCA notes that the 70 percent strength level can be achieved more quickly when concrete cures at higher temperatures (and inversely at longer intervals when curing during lower temperatures) or when certain cement/admixture combinations are used.
During the drying process, the largest portion of water that must leave the slab is known as “water of convenience.” If the water-to-cement ratio is higher than the recommended level (.45 to .50), it means more water of convenience will be present in the concrete, which will negatively impact the quality of the slab in a number of ways, including:
- substantially increasing the concrete dry time
- creating a more porous and permeable concrete
- increasing the likelihood that the pores will be interconnected (an interconnected pore system from the bottom of the slab to the top will serve as an avenue of transport for liquid water or water vapor to move through the slab)
- creating higher chance of Moisture Vapor Emission (MVE) in the future with vapor barrier breakdown/penetration or drainage
- contributing to concrete laitance or weak surface
Moisture-related problems are also encountered in suspended slabs, where the concrete used often has a high water-to-cement ratio to make it more fluid and easier to pump. Because suspended slabs typically contain lightweight aggregate, they cannot be tested with calcium chloride tests (see sidebar for details about concrete testing).
In order to achieve specified flatness and levelness criteria, it can be tempting to use ride-on power trowels to get the slab to a hard, level finish quickly—but it comes at a substantial risk. The power troweling process can actually have the opposite effect, and slow down a project and add costs. This is because the smooth, glossy surface that results from power troweling actually retards the drying process by smoothing over the naturally porous characteristics of concrete and sealing in the moisture that needs to be released before the direct installation of a floor covering. Additionally, the slab can be overworked and even “burned” by some high-speed blades, closing up the natural pores or pathways that allow moisture within the concrete slab to evaporate. In other words, specifying a power trowel finish should be done carefully with the end flooring application in mind and never at the expense of the recommended drying schedule.
Another so-called solution to expedite the drying process of new concrete slabs is to apply temporary heat using propane- or oil-based sources. Unfortunately, this process produces the opposite effect desired by introducing “wet” heat, which actually inhibits drying of the slab. As a general rule of thumb, for every gallon of propane burned in the drying process, a gallon of water is produced. Using heat sources creates an abundance of carbon dioxide, which accelerates the formation of calcium carbonate and may inhibit or prohibit adhesive bond or create a “dusty” surface.
What Do You Do?
In order to achieve a properly formed concrete slab in new construction projects that will help prevent moisture problems from arising in the future, there are a number of steps that should be taken at the onset of the project. These include:
- Plan ahead with concrete specs. In your concrete mix specifications, be sure to require a .45. to .50 water-to-cement ratio, and limit fly ash content to no greater than 15 percent or 20 percent of the cementing material.
When curing, go “old school” and wet cure the slab. Curing blankets are now available for this purpose, and there is a negligible cost difference between wet curing and topical material systems. Most membrane forming curing compounds do not degrade over time, if at all, making them a poor choice for new construction slabs. Penetrating “cure and seal” products are intended not to deteriorate and should not be applied on concrete intended to host floor coverings. Also, be sure to avoid cold conditions or plan to use heating blankets. The same goes for windy conditions—avoid them or prepare for wind protection of the slab.
If a curing compound is used, be sure it is removed within 30 days after application. If the compound is prone to degradation, it typically happens late in the construction process, dramatically slowing down the drying time. If they do not degrade and flooring is installed, they will break the adhesive bond and release the “free” water causing flooring failure.
Finally, for the concrete finish, be sure to have the contractor leave a bull-floated finish, which should cost less than that artist finish. Pay the flooring contractor the cost difference to skim the floors—they are typically going to skim one coat anyway.
- Push for closure of building. The sooner the slab is enclosed, the sooner effective drying will start. Prior to HVAC installation, avoid the temptation to run propane or oil heat, which slows the drying process. Instead, run electric heaters and dehumidifiers; since moisture vapor is the great equalizer, the lower the relative humidity of the room, the more moisture tries to equalize that pressure from the ground up.
Once the HVAC is ready for use, push to have it running as quickly as possible. Doing so ensures stabilization of the concrete slab and creates an accelerated drying condition within the interior environment.
- Communicate early. Establishing open lines of communication early is the most effective way to ensure the specifications listed in the previous point are adhered to consistently. When communicating with architects, be sure to include details on the following specifications: concrete ratios and mix; concrete finishes; curing compounds; and sub-slab vapor retarders. Additionally, ask for third-party certification for concrete testing (see related sidebar), as well as allowances or deductive alternates to be in bid for moisture mitigation if needed.
When working with flooring contractors, confirm in advance they either have testing included in their contract or let them know third-party testing is covered. Also, be sure to set a meeting with the concrete contractor prior to pouring to discuss whether a curing compound is necessary, the concrete mix and finish, as well as the sub-slab vapor retarder. If they are testing the floor, have them set RH probes months prior to scheduling. Calcium tests are a waste prior to proper conditioning as they don’t provide accurate readings, but probes will start to tell a story. If the potential of moisture mitigation is needed, have the contractor price earlier rather than later so the end user doesn’t feel stuck if they are not able to have “allowances” up front.
2. Renovation Slabs & Trenches
Now that we’ve covered new construction slabs, we’ll turn our attention to the second area of concern with concrete and moisture: renovation slabs and trenches. As any design or construction professionals knows, existing slabs can be (and often are) flawed. This may be the result of a number of factors, including the lack of an effective moisture vapor retarder or barrier; a degraded, broken down, or torn barrier; high ground water, irrigation, or drainage; or a high water-to-cement ratio, creating continuous interconnected pores—all of which contribute to flooring failures.
Contrary to popular belief, bonded existing flooring does not necessarily equate to the absence of moisture issues. Many existing floors are covered with the original layer having been installed with a solvent-based adhesive, increasing moisture levels in the floor. Also, existing materials are oftentimes more permeable than the new materials specified for installation.
Additionally, existing concrete slabs are characterized by continuous moisture vapor emissions. Moisture naturally occurring in the earth or added through irrigation and drainage is the most troublesome source in older buildings and can equally impact newer ones. In fact, the largest foundation of moisture transmission occurs when it is not properly inhibited from reaching the concrete slab. The reason this is so problematic is because moisture in a floor slab, which carries salts, always tries to equalize with moisture in the air above it. As salts are carried to a slab’s surface, it expands, causing the breakdown of adhesive bonds. Further, tree roots, poor landscaping, improper gutter and drainage systems, along with poor or no vapor retarder mixed with over-watered, highly porous concrete, create the “perfect storm” for an epic floor system failure.
The effects of excessive moisture vapor transmission (MVT) are many and can be very problematic at the floor surface. These negative outcomes include:
- Constant flow of moisture
- Alkaline salt migration
- Adhesive re-emulsification
- Trapped water collected under flooring
- Bond failure
- Mold and mildew
- Odors
What Do You Do?
As is the case with new construction slabs, design and construction professionals should plan ahead to help eliminate or mitigate excess moisture in existing slabs before proceeding with flooring specification and installation plans. The following steps should be helpful in dealing with flawed renovation slabs:
- Learn the concrete history of the building. Check with the building owner or facility manger to confirm the placement of vapor retarder. All flooring products require a vapor retarder for warranty, so be sure to inquire about original concrete specification/submittals. Also, be sure to ask about previous floor coverings to find out the answers to questions such as:
- How many layers were installed?
- Were there any issues with floor failures?
- Were there maintenance issues that could not be resolved?
- Analyze building drainage, irrigation, and landscaping. If there is an existing gutter system in place on site, have a contractor or facility manager check to see if it is functional and effectively diverting water away from the building. A landscape architect should analyze the existing site to ensure that it is graded properly, that landscaping is semi-below grade areas, and that there are no areas of washed out soil or mulch. Finally, the skirt of the building should be inspected for soil or mulch build-up to or past weak holes, as well as for any signs of mildew.
- Test/analyze building interior. The first place to look for moisture issues in the concrete is obviously at the existing floor surface. Look for any signs of moisture (peaking seams, bubbles, hollowness, cracked or broken tiles) and take appropriate steps to locate and repair the problem. Keep an eye out for signs of moisture in other finishes as well, including chipped or peeling paint, sagging ceiling tiles, rusted doorframes, or moisture marks on wood base or behind cover bases.
- Test concrete. If you’re able, ask that an independent third-party conduct concrete testing according to ASTM standards (see related sidebar) prior to providing a quote for the project. If testing is not possible prior to the quote, make sure it is done as early in the project as possible, and absolutely prior to HVAC shutdown.
- Communicate early. When it comes to communicating with the architect or owner regarding existing concrete slabs, speak to the importance of effective sub-slab vapor retarders and/or lack thereof upfront. As noted above, also inquire about third-party testing prior to the bid or directly afterward (and if unable to discuss, clarify the bid offer). If possible, emphasize the importance of keeping the “service condition” during the renovation, and make allowances for moisture remediation.
With the flooring contractor, confirm that they either have testing included in the specifications or let them know third-party testing is covered, and plan a pre-bid meeting to specifically discuss how to avoid change orders, as the contractor may know about the conditions of the building from previous work. Also, develop plans based on the ability to test and on the logistics of the job with the owner and other trades involved.
Trenches: What Do You Do?
Trenches are an unavoidable problem that are typically not thought of as an issue and, therefore, are not planned for properly. Unfortunately, trenches can ruin a floor due to vapor emissions quickly because they are normally filled with a typical or slow-drying cement. Additionally, trenches are usually over-watered with “water of convenience” to ease workability—a scenario in which the concrete becomes too porous and creates a weak or laitance surface, resulting in a number of flooring failures previously identified.
As with new construction and renovation slabs, the key to successfully addressing moisture issues with trenches is essentially the same:
- Plan ahead and communicate. When filling a trench, make certain that it is done with the proper water-to-cement ratio; installed per concrete institute specifications, including proper vapor retarder, repaired vapor retarder, and/or bonding agent from new to existing concrete; and allow for required drying times. Additionally, if drying time is not allowed due to project constraints, request special pricing for use of fast-setting cement or use of two-part, 100-percent solid mitigation.
Finally, communicate with the flooring contractor about the quantity, time frame, and pricing as early as possible to avoid further costs and delays.
The Bottom Line
As we’ve seen, there are myriad problems associated with moisture and concrete in both new and existing buildings that can cause plenty of headaches, delays, and additional costs to projects. While the problem of persistent moisture in concrete that leads to flooring failure is a formidable one, it doesn’t have to be an unavoidable cost of doing business. With thoughtful consideration, planning, and execution, design and construction professionals can not only mitigate the effects of this common issue, but also develop more robust and reliable flooring specifications that will not only look great, but last a lifetime.
Protection Tests for Moisture in Concrete
In commercial building projects where flooring or impermeable membranes will be installed on top of a concrete slab, a test for excess moisture is a common requirement today—and for many good reasons, as this article has previously illustrated. However, “while several standard moisture test methods are available, no single test reveals everything that should be considered in deciding when flooring can be installed or a coating applied,” warned Tom Klemens in “Concrete Construction.” Further, Klemens said that the test used is only as good as the stability of the environmental conditions. In other words, they should represent the long-term conditions under which the building will be expected to perform.
The two most commonly used industry standards for testing the moisture level of concrete in new or existing slabs are ASTM F1869-16 and ASTM F-2170-16, both of which are detailed below:
- ASTM F1869-16: Standard Test Method for Measuring Moisture Vapor Emission Rate of Concrete Subfloor Using Anhydrous Calcium Chloride. Extrapolated test data is reported as pounds of moisture vapor being emitted from the concrete subfloor over a 1,000-square-foot area during a 24-hour period. The subject building must be acclimated at or near the “service” temperature and relative humidity levels anticipated during occupancy or use.
Note: Some floor covering manufacturers no longer recognize calcium chloride test results for determining concrete dryness, however. This is due to the fact that the test only measures the top ¼ inch to ½ inch of the surface, giving potentially false readings as greater volume of moisture may be present at the floor covering/concrete interface after installation is completed than was originally anticipated. ASTM F 1869 specifically excludes calcium chloride tests from use on concrete containing lightweight aggregate and/or gypsum screeds.
- ASTM F-2170-16: Standard Test Method for Determining Relative Humidity in Concrete Floor Slabs Using in-situ Probes. This test method covers the quantitative determination of percent relative humidity in concrete slabs. The subject building must be acclimated at or near the “service” temperature and relative humidity levels anticipated during occupancy or use. This method provides more predictive test data, and test results appear to be less impacted by the type of—or lack of—floor coverings in place prior to testing. Testing performed with single-use probes has brought the cost down to a level comparable with calcium chloride-type tests. Some resilient flooring manufacturers exclusively require in-situ relative humidity testing, while others are listing it as the preferred test method.
While probes cannot give “certified” readings without meeting ambient service requirements, they can be put in early to monitor or watch the drying properties, allowing earlier action if concrete drying will not meet the project’s schedule.
Issued in 2002, the major advantage of the F-2170 method is that it allows for remote monitoring. “Once in place, the instruments can give continuous, instantaneous moisture readings at any depth in the concrete floor slab,” explained Howard Kanare, president at Koster American. “Because the new test method uses electronic sensors, data can be output to data loggers and transmitted from remote locations without requiring technicians onsite. Buildings can be monitored while floors are drying over a long period of time and the data can be used to predict when a floor will be ready to receive a moisture-sensitive finish.”
Who should provide testing?
Both the flooring contractor and general contractor have a vested interest in the test results. It is best to allow an independent, third-part- certified testing company to conduct the concrete assessment and offer the results. This keeps the general contractor and flooring contractor from looking like they just want a change order by separating their interests. As an added benefit, the owner is less likely to be upset with the construction team if failures, delays, or additional costs occur.
In fact, the Floor Covering Installation Contractors Association (FCICA) released an official position paper on not only the importance of moisture emission testing, but also on the governance of such a critical responsibility:
Changes within the construction industry continue to keep even the most dedicated flooring contractors in a constant struggle to install all kinds of flooring systems properly. Floor covering materials themselves are in a constant state of flux with new materials, backing and coatings being developed that often have an impact on the installation of these materials. Flooring adhesives are for the most part solvent free, meaning that more care is needed during flooring placement to ensure excess water from the adhesive has dissipated. High water/cement ratios that facilitate concrete placement and finishing, concrete with lightweight aggregate and concrete that dries from only one side mean longer drying times are required before flooring can be installed. This is in direct opposition to what the owners want; fast track construction. A construction schedule that was once a yearlong process is now compacted into a few months. Add to this the changes in the location of the vapor retarder, the increased use or lightweight aggregate, fly ash and admixtures in the concrete mix design, and it is clear that a more scientific approach is needed to clearly identify problems associated with substrate induced flooring failures.
With all the above referenced factors listed, it is unreasonable to expect a flooring installer to be responsible to correct concrete problems that they have had no role in creating. While they are continually encouraged to develop sufficient expertise to anticipate and ask the proper questions for evaluation of potential concrete/flooring problems, it is not their responsibility to correct problematic substrate conditions created by others.
Another factor is that the flooring contractor has a vested interest in ensuring the integrity of the substrate as being 100-percent suitable prior to beginning the flooring installation process. We know the adage, “Once you start installing, you own the floor.” For this reason, flooring contractors are often viewed as having a built-in agenda to get change orders for flatness and moisture mitigation that are naturally resisted by the general contractor, owner, and/or architect.
An independent testing company has no such agenda; it tests the substrate and reports the results. Decisions can then be based on unbiased test results. General contractors and flooring contractors must be made aware of all of the test results. Most flooring manufacturers have specific test criteria and limits required for the moisture conditions of concrete. The flooring contractor should only commence installation once these requirements are met and should not begin flooring installation if any requirement is outside of the manufacturer recommended limits.
FCICA recommends that one of the best ways to ensure fair and responsible testing is to specify that it be done by a third-party independent and/or certified testing company. Their results are clear and unbiased. The project can then proceed in accordance with the findings.
Counting the Costs: Moisture-related Problems in Buildings
The presence of excess moisture in buildings can be a costly undertaking to address and can have negative impacts on occupant health. As a result, moisture control is fundamental to the proper functioning of any building.
According to the U.S. Environmental Protection Agency (EPA) controlling moisture is important to protect occupants from adverse health effects and to protect the building, its mechanical systems, and its contents from physical or chemical damage. Yet, moisture problems are so common in buildings, many people consider them inevitable.
Many common moisture problems can be traced to poor decisions in design, construction, or maintenance. The American Society of Heating, Refrigerating and Air Conditioning Engineers (ASHRAE) notes that, more often than not, the more serious problems are caused by decisions made by members of any of a number of different professions. However, such problems can be avoided with techniques that are based on a solid understanding of how water behaves in buildings. Moisture control consists of:
- Preventing water intrusion and condensation in areas of a building that must remain dry.
- Limiting the areas of a building that are routinely wet because of their use (e.g., bathrooms, spas, kitchens and janitorial closets) and drying them out when they do get wet.
To be successful, moisture control does not require everything be kept completely dry. Moisture control is adequate as long as vulnerable materials are kept dry enough to avoid problems. That means the building must be designed, constructed, and operated so that vulnerable materials do not get wet. It also means that when materials do get wet, the building needs to be managed in such a way that the damp materials dry out quickly.
Impacts of Moisture on Human Health
At the request of the U.S. Centers for Disease Control and Prevention (CDC), the Institute of Medicine (IOM) of the National Academy of Sciences convened a committee of experts to conduct a comprehensive review of the scientific literature concerning the relationship between damp or moldy indoor environments and the appearance of adverse health effects in exposed populations. Based on their review, the members of the Committee on Damp Indoor Spaces and Health concluded that the epidemiologic evidence shows an association between exposure to damp indoor environments and adverse health effects, including:
- Upper respiratory (nasal and throat) symptoms
- Cough
- Wheeze
- Asthma symptoms in sensitized persons with asthma
The committee also determined that there is limited or suggestive evidence of an association between exposure to damp indoor environments and:
- Dyspnea (shortness of breath)
- Lower respiratory illness in otherwise healthy children
- Asthma development
Details of the results of this review were published in a 2004 report, Damp Indoor Spaces and Health. It is also important to note that immuno-compromised individuals, such as some categories of hospital patients, are at increased risk for fungal colonization and opportunistic infections. After the publication of the IOM report, a study by Lawrence Berkeley National Laboratory concluded that building dampness and mold raise the risk of a variety of respiratory and asthma-related health effects by 30 to 50 percent. A companion study by EPA and Berkeley Lab estimated that 4.6 million cases of asthma (or 21 percent of all asthma cases in the U.S.) could be attributed to exposure to dampness and mold in homes.
Damage Caused by Moisture
In addition to causing health problems, moisture can damage building materials and components. For example:
- Prolonged damp conditions can lead to the colonization of building materials and HVAC systems by molds, bacteria, wood-decaying molds, and insect pests (e.g., termites and carpenter ants).
- Chemical reactions with building materials and components can cause, for example, structural fasteners, wiring, metal roofing, and conditioning coils to corrode and flooring or roofing adhesives to fail.
- Water-soluble building materials (e.g., gypsum board) can return to solution.
- Wooden materials can warp, swell, or rot.
- Brick or concrete can be damaged during freeze/thaw cycles and by sub-surface salt deposition.
- Paints and varnishes can be damaged.
- The insulating value (R-value) of thermal insulation can be reduced.
The High Costs of Moisture Problems
Health problems and building damage due to moisture can be extremely expensive. Berkeley Lab estimates that the annual asthma-related medical costs attributable to exposures to dampness and mold total approximately $3.5 billion in the U.S. But many more adverse health outcomes due to damp buildings have been reported, each with associated costs of its own. And damage to the building itself is also costly. Building owners and tenants bear a significant proportion of these costs, including:
- Absenteeism due to illnesses such as asthma.
- Reduced productivity due to moisture-related health and comfort problems.
- Increased insurance risk, repair and replacement costs associated with corroded structural fasteners, wiring and damaged moisture-sensitive materials.
- Repair and replacement costs associated with damaged furniture, products, and supplies.
- Loss of use of building spaces after damage and during repairs.
- Increased insurance and litigation costs related to moisture damage claims.
Source: U.S. EPA
This article is advertiser sponsored

REFERENCES
ASTM F 1869, “Standard Test Method for Measuring Moisture Vapor Emission Rate of Concrete Subfloor Using Anhydrous Calcium Chloride,” (2016), ASTM International
ASTM F2170-16a, “Standard Test Method for Determining Relative Humidity in Concrete Floor Slabs Using in situ Probes,” (2016), ASTM International
ACI 302.1R, “Guide to Concrete Floor and Slab Construction,” (2015), American Concrete Institute
ACI 303.2R, “Guide for Concrete Slabs That Receive Moisture-Sensitive Flooring Materials,” (2015), American Concrete Institute
ACI 308R-16, “Guide to External Curing of Concrete,” (2016), American Concrete Institute
Brewer, H.W., “Moisture Migration – Concrete Slab-on-Ground Construction,” (1964), Journal of the PCA Research and Development Laboratories, Vol. 7, Num. 2
Building Research Institute, “Effectiveness of Concrete Admixtures in Controlling Transmission of Moisture Through Slabs-on-Ground: A Report of the Building Research Advisory Board to the Federal Housing Administration,” (1958), University of Michigan Libraries, National Academy of Sciences- National Research Council, Publication 596
“Concrete Moisture Testing,” (2013), Flooring Contractors Association
Dolen, T. P., “Historical Development of Durable Concrete for the Bureau of Reclamation,” (2008) U.S. Department of the Interior
“Moisture Emission Testing – Responsibility and Qualifications for Testing,” (2001), World Floor Covering Association
Smith, R., “Don’t Power Trowel Blindly and Trap Unwanted Concrete Moisture,” (2014), RHSPEC
Spangler, J., “Moisture Related Flooring Failure: How Bad Can It Be?” (April 24, 2013), Wagner Meters
Zemajtis, J. Z., “Role of Concrete Curing,” (2011), Portland Cement Association
About the Author

Robert Nieminen
Market Content Director
Market Content Director, American School & University, Architectural Products, BUILDINGS, and interiors+sources
Robert Nieminen is the Market Content Director of four leading B2B publications serving the commercial architecture and design industries: American School & University, Architectural Products, BUILDINGS, and interiors+sources. With a career rooted in editorial excellence and a passion for storytelling, Robert oversees a diverse content portfolio that spans award-winning feature articles, strategic podcast programming, and digital media initiatives aimed at empowering design professionals, facility managers, and commercial building stakeholders.
He is the host of the I Hear Design podcast and curates the Smart Buildings Technology Report, bringing thought leadership to the forefront of innovation in built environments. Robert leads editorial and creative direction for multiple industry award programs—including the Elev8 Design Awards and Product Innovation Awards—and is a recognized voice in sustainability, smart technology integration, and forward-thinking design.
Robert's work has earned him industry-wide recognition throughout his career, including:
- ASBPE Award (2019, 2018, 2017, 2015)—Best Regularly-Contributed Column; retrofit
- TABPI Award (2017, 2016)—Top 25 Entries, Cover Story; Retail Environments
- WPA Maggie Award (2011, 2010, 2008)—Best Publication, Trade; interiors+sources
- FOLIO: Eddie Gold Award (2022, 2007)—Best Feature Article & Special Section; interiors+sources
- Contributing author of ASID’s 2020 Outlook and State of Interior Design report, as well as The State of the Interior Design Profession (Fairchild Books, 2010), which earned a place on the International Federation of Interior Architects/Designers’ “50 Must Read, Must Have” book list.